Customers frequently ask us if they can apply HTTPS to their web site. However, the truth is that they already have an SSL Certificate installed once, as it is only part of that process when the website is built using WordPress.
So, let me show you how to install a really simple SSL 3 plugin in this tutorial. The good thing about this plugin is that it forces a WordPress site to HTTPS quickly and easily instead of attempting to redirect a .htaccess and then having to resolve mixed content errors with photos and other media manually.
Let’s Learn About Software Setup process:
Log in to the WordPress site admin section in which you will be working and now from the sidebar, hover on Plugins and then click on the Add New option.
Check into the search bar for “Very Easy SSL.”
Now, to install the plugin, click on the install option.
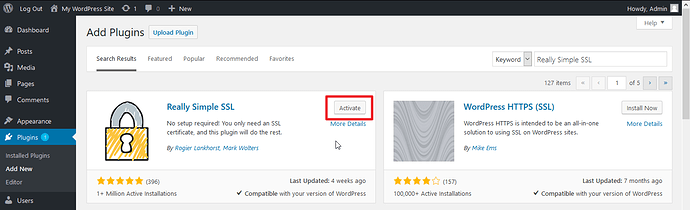
In the same spot click Activate. You can also activate it from left side Installed Plugins.

Setting up the Plug-in;
- Once you are ready to push the site to HTTPS, you can enable the Installed Plugins functionality or the notification button at the main page.
Note, doing a site backup before activation is always a good idea.
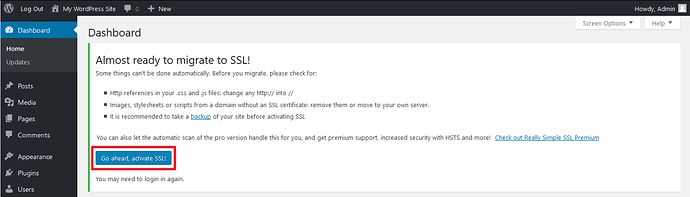
2. Turn on SSL after you press Go ahead! You will see a message showing the completed HTTPS redirect

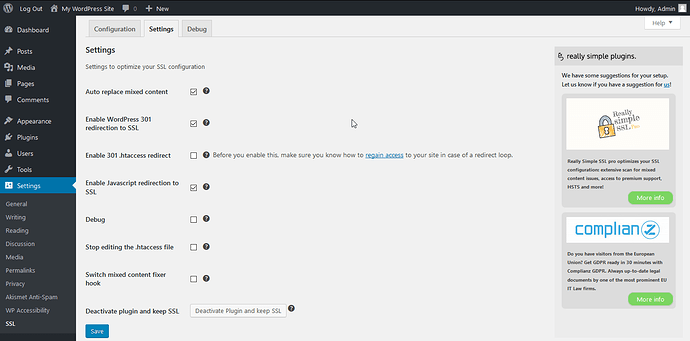
- By selecting Settings and SSL, you can set the settings to Really Simple SSL.
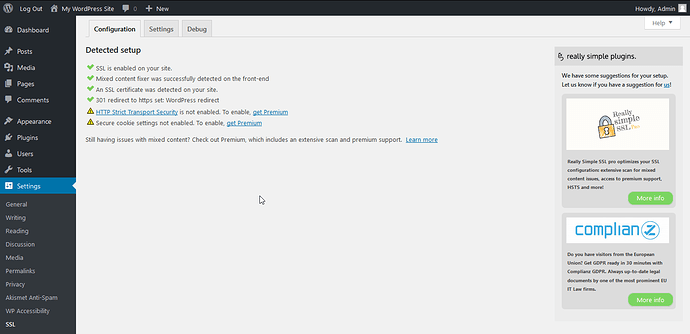
4. You can test to make sure that HTTPS is active by opening the website into a new browser window and navigating without HTTPS to your website-e.g. example.com. It will switch to HTTPS, automatically.